Create a workspace
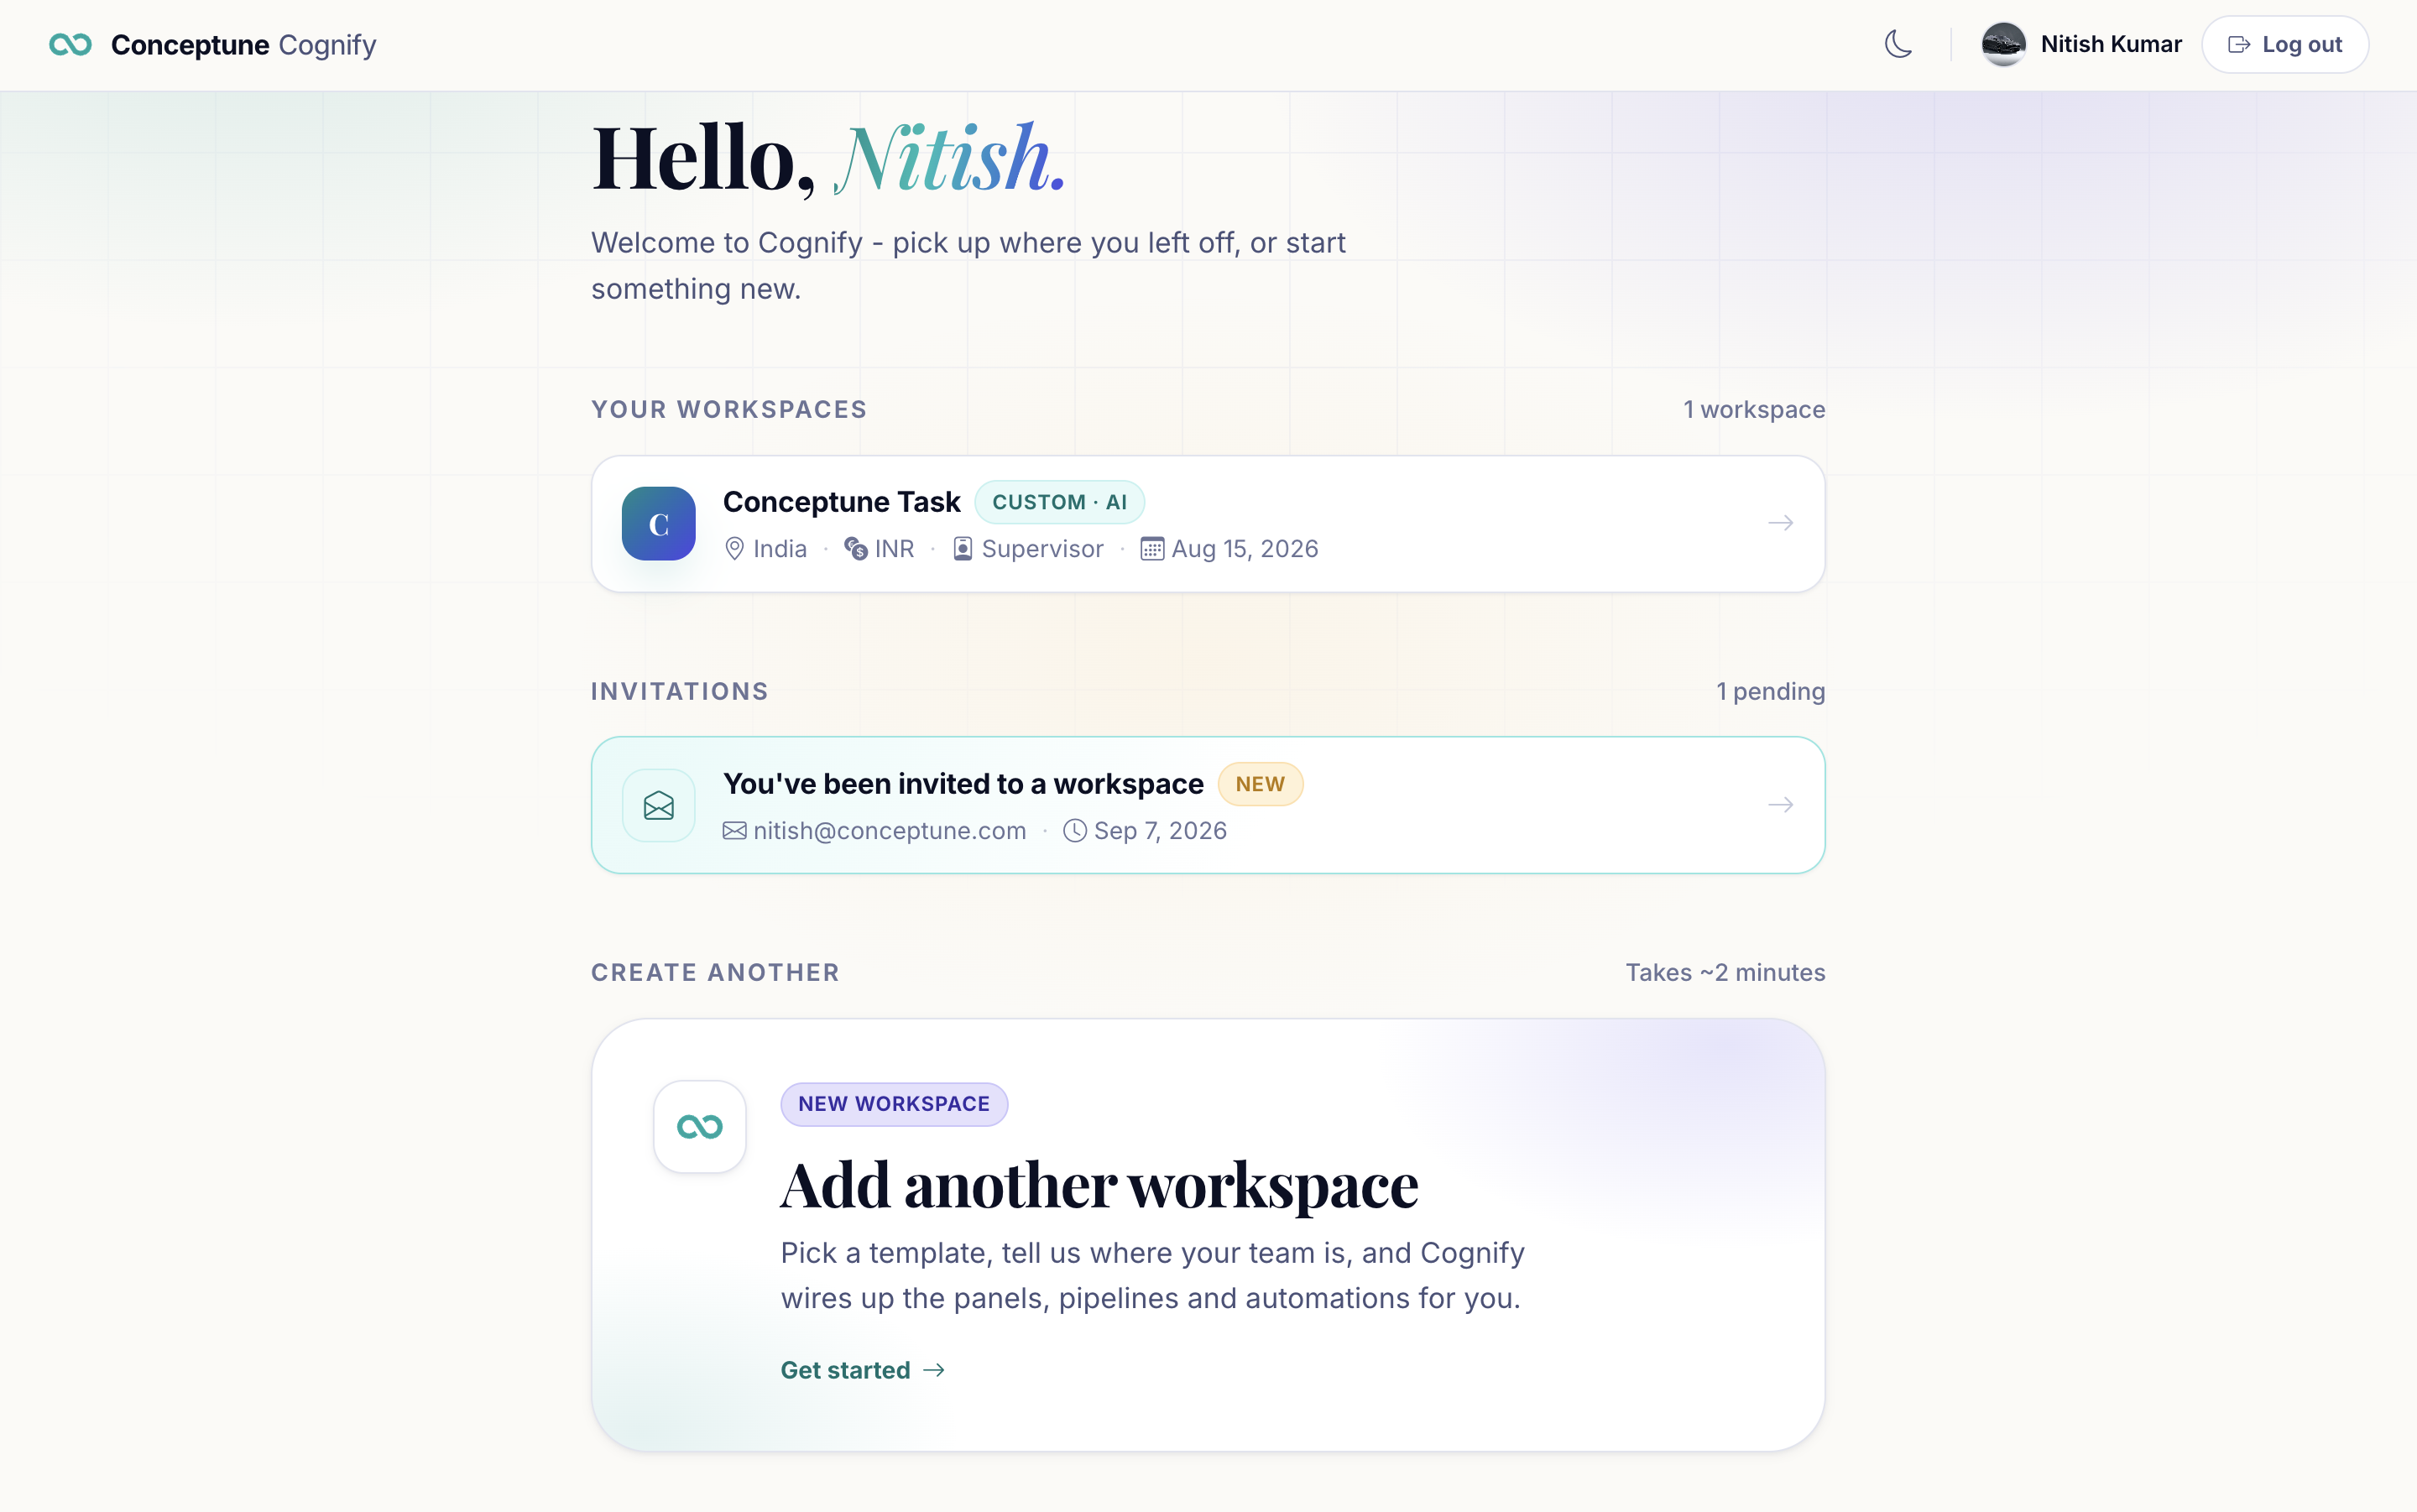
The first screen after signing in is the workspace picker. From there you create a workspace in four steps (about two minutes) and pick the template that decides what Cognify pre-builds for you.
The workspace picker
The picker lists every workspace you own or were invited to, plus any Invitations still waiting for you. It is also where you go to leave one workspace and enter another.
The four steps
-
What should we call your workspace?
The name that appears in the sidebar and on the invitations you send. Use the team or company name. You can change it later. -
Pick a workspace template.
This decides which setup guide you get on the dashboard and what is pre-built. The four templates are covered below. -
Where is your team based?
Sets the workspace currency, which is used anywhere Cognify shows money, number columns formatted as currency, deal values, plan pricing. -
Describe your business needs.
Only asked for the Prompt Magic template. Cognify AI reads this and drafts panels from it, so be specific: say what you track, what stages it moves through, and who works on it.
Then Create workspace. You land in the console with the setup guide waiting on the dashboard.
The four templates
| Template | Best for | What you get |
|---|---|---|
| Social Chatbots | Automating conversations across social channels | A setup guide pointed at creating a Social Chats panel and connecting a chat channel |
| Ticketing System | Customer or internal requests that must be resolved | A guide pointed at a Ticketing panel and an email connection |
| Prompt Magic | “Just build it for me” | Cognify AI drafts the panels from your description; you review and adjust them |
| Custom | You already know what you want | A blank workspace and the shortest guide to a working dashboard |
The setup guide
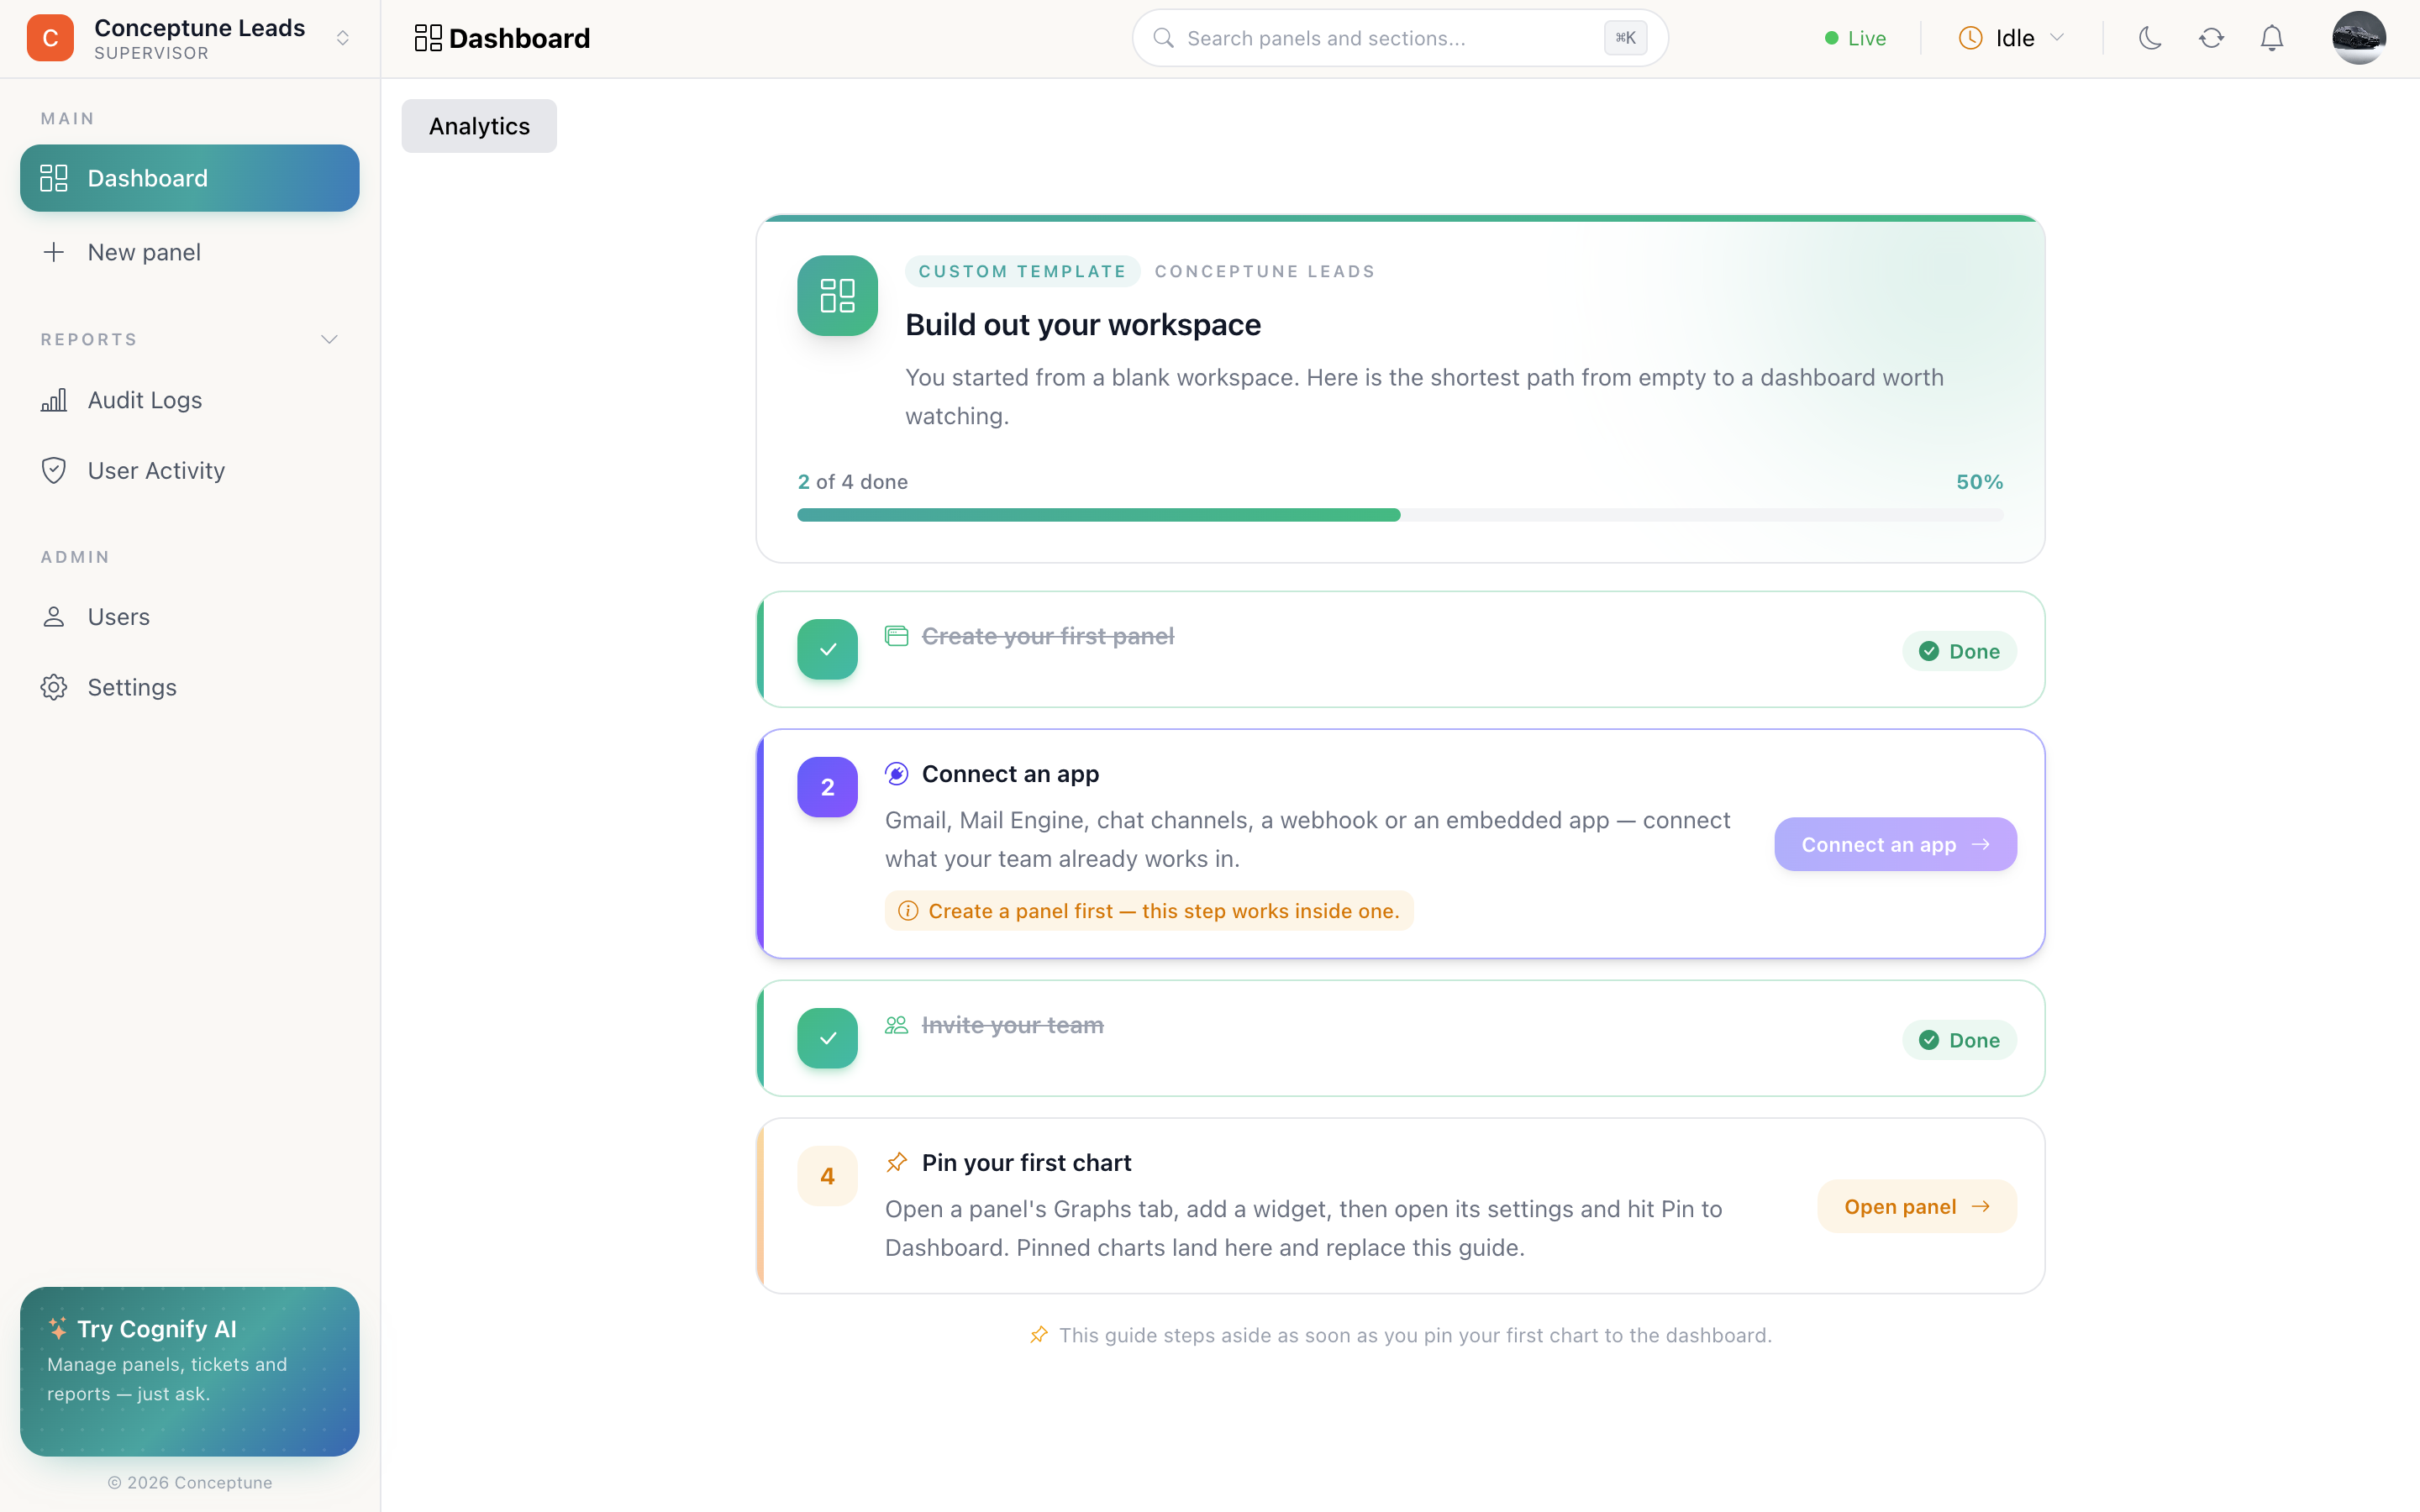
Whichever template you picked, the dashboard shows a short checklist while the workspace is still empty: create a panel, connect an app, invite the team, pin your first chart. It ticks itself off as you go and disappears the moment your first chart lands.
Steps your role cannot perform are hidden, so nobody is pointed at a button they do not have. See Dashboard for what replaces it.
How do I…
Create a workspace: Workspace picker → New workspace → walk the four steps → Create workspace.
Accept an invitation: Open the invite mail, or the Invitations list on the workspace picker, and accept. The workspace appears in your list with the role the admin gave you.
Switch workspaces: Press ⌘K / Ctrl+K → Switch workspace, or use the workspace name at the top of the sidebar.
Invite the rest of the team: Users → Members → invite. Covered in Members and invites.
Delete a workspace: Settings → Delete Workspace, then confirm. This removes the workspace and everything in it. Only an admin, or someone with Can manage Settings, sees the option.